Story
From Caps to Crafts
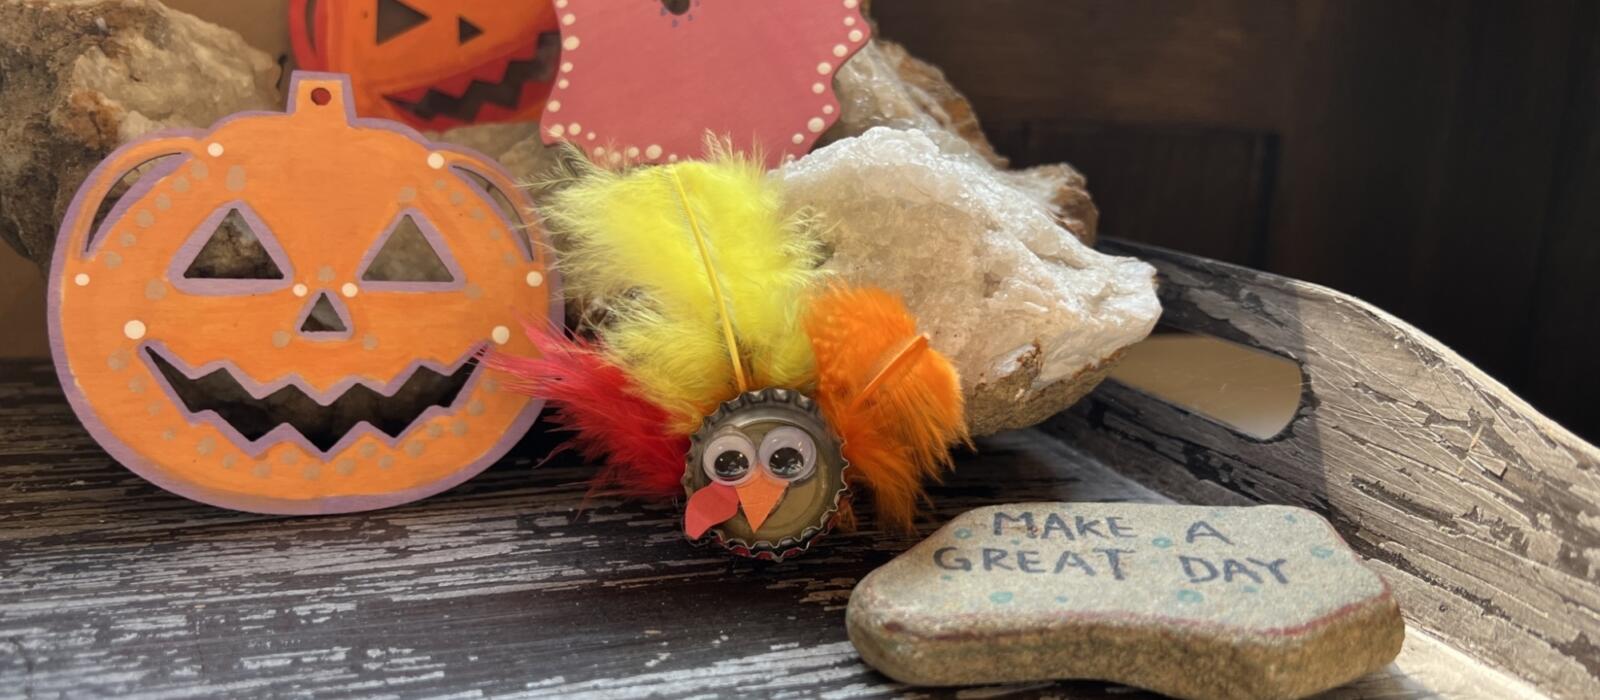
It’s (almost) turkey time! Who doesn’t love a great Fall activity and seasonal décor? Camp Blackberry is sharing step-by-step instructions for how to create a Bottle Cap Turkey for a little festive fun. Perfect for all ages to enjoy, get crafty and make your own flock!
Supplies:
Red and Orange Construction Paper
Googly Eyes
Bottle Caps
Round Magnets
Assorted Colored Feathers
Scissors*
Hot Glue Gun*
Glue Sticks
Directions:
- Using red and orange construction paper: Cut a raindrop shape wattle (this is the part that hangs down from the chin of the turkey) from the red, and a small triangle shape for the beak from the orange.
- Grab your hot glue gun. Place a small dot of glue on the wattle, and attach it to the beak.
- Take both pieces, now glued together, and put a small amount of hot glue on the center of your bottle cap. Carefully place your beak and wattle onto the cap, and hold until dried.
- Above your turkey’s beak and wattle, hot glue two googly eyes to the cap, bringing your turkey friend to life!
- Using either the red or orange construction paper, cut a small strip (about the diameter of your bottle cap).
- Hot glue each feather tip to the strip of construction paper, using whatever colors you like, then glue the strip to the back of your bottle cap. This strip of construction paper adds more support to your feathers, keeping them upright and ruffled.
- Once your wattle, beak and feathers are attached to your bottle cap, hot glue a small round magnet to the back of your bottle cap.
- Stick your new magnetic bottle cap turkey to your refrigerator, and have a Happy Thanksgiving!
*Kids, make sure you have an adult to help you when using hot glue and scissors!